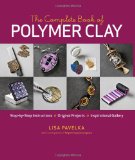
The Complete Book of Polymer Clay

The Complete Book of Polymer Clay by Lisa Pavelka

Lisa Pavelka begins her book with a disclaimer. That given all the possibilities of polymer clay, it’s impossible to write a truly complete book about it.
What she does try to do in this book is to provide instruction for a lot of the techniques used in working with polymer clay in an easily understandable format with lots of photos. She reassures people new to the medium through out that getting professional results happens quickly with practice.
It looks a little intimidating for an absolute beginner, don’t be intimidated. If polymer clay is something you’ve been interested in working with, this book is an excellent introduction to many of the things that can be done with it. The focus of the book is on embellishment rather than sculpting and the techniques can used to make truly impressive beads, focals and cabochons for beading.
She starts with an introduction to the medium, a brief history, the types of clay available,color basics, making color chip charts, the sorts of tools you’ll be using and improvising with and how to handle, cure and store clay.
After that you get into the playing with clay parts of the book. Starting with the Skinner blend and the sorts of canes and techniques you can do with that. Each chapter covers a different technique, and how it can be used in application. Millefiori, image transfers, mokume gane and many other techniques. There are a bunch of faux effects so you can learn how to make an impressive simulation of wood veneer inlays, ivory, cinnabar or one of my favorites, dichroic glass effects.
The last part of the book has a few projects that can be stepping stones to your own creations, a gorgeous gallery that shows how many fine jewelry and art techniques can be done with polymer clay, and a troubleshooting section.
I really like this book, and it will have a permanent place in my polymer clay books.
You can get the book directly from the publisher, Taunton Press or you can buy it from Amazon using the link below.
Posted in Beads, polymer clay | Leave a comment

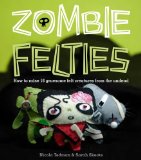
Zombie Felties

What’s the most adorable and disturbing thing you’ve seen recently? For me it has to be Zombie Felties. I really loved the first Felties book, so I was fairly sure that this one would be just as much fun. Felties are tiny little dolls made from craft felt. They are stitched with embroidery floss and thread, accented with beads and sequins and embroidery techniques and are just wonderful little projects for gift tie-ons, making into brooches and as small gifts. They are quick, affordable and a great portable craft or craft to do with kids just learning to hand sew. The Zombie Feltie book focuses on the creepy side of this craft. Just perfect for Halloween really, and the projects stitch up fast enough you could make a whole bunch little creepy cute brooches to wear through October. There are a bunch of just wonderful patterns, sewing instructions and tips on making felt easier to work with in small scale. The projects include, as you’d expect, a few regular zombies. Then the authors got creative. A diminutive zombie fairy holds a scepter topped with a skull, zombie vampires, a dead duck with little bullet holes and blood, a pumpkin head zombie has sequin brains coming out of a break in the pumpkin. It’s gruesome, it’s adorable. It’s one of the cutest and most clever takes I’ve seen on horror themes in crafting. 16 full sized patterns and instructions. Just perfect for your favorite little ghoul, as long your favorite ghoul is old enough. The finished projects do have small parts and some of them have jagged edges. You can get the book directly from the publisher, Andrews McMeel Publishing or below from Amazon.com (the Amazon.com link is an affiliate link) Also, for printie loving crafters, the end of the book has a little coffin you can copy and make coffins to keep your little zombies in!

Posted in halloween, holiday, sewing | Leave a comment

Mod Podge

I love this stuff. It creates a nice shiny finish for decoupage with minimal effort, it also works nicely to seal paper art projects like layered paper pins. The glossy finish is my favorite because of the durable shine but the matte is also wonderful for projects that you don’t want to be shiny.
Just apply thin coats, and let them dry 20 minutes before adding another coat. I usually do single coats for light weight projects, and 4 or 5 coats for anything that will see a lot of use. It’s water-based so clean up is very easy while it’s still wet.
It’s a classic.

You can find a lot of wonderful ModPodge projects at Mod Podge Rocks.

Posted in paper crafts, supplies | 2 Comments

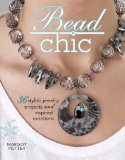
Bead Chic by Margot Potter

This is my kind of fast beading. Margot mixes up wire, beads, and easy to do techniques to create fun, colorful jewelry. It’s a book for people who like working with wire but don’t want to do the filigree fanciness of a lot of the classic wire wrap projects and people who enjoy bead stringing.
The introduction includes information about the supplies, tools and techniques you’ll need to create the projects in the book. They are well photographed and explained. A good starting point for any beginner or hobbyist, it explains how to make wrapped loops, how to do rosary style chains, how to texture using a hammer and basics of creating clasps with wire.
The projects are simple, but written to explore different concepts in jewelry making. The first chapter is about scale. She shows a project like the Chaos In Pearls, and at the end of the project she shows a bracelet made using the same techniques but different colors and sizes of beads.
The next chapter is color.The projects are simple and very wearable. At the end of each project, she shows a different example in different colors which show how dramatically the look is changed by changing up the palette.How colors and bead types can change a project from funky to elegant to feminine to Bohemian.
Texture comes next. Again, by changing texture and layout of the skills used in the project, you can make something completely different. The Curlicue earrings are reinterpreted as a delicate pair of tendril earrings.
The following chapters are Pattern, Foundations and Focal Elements.
While the projects are simple, the design information is wonderful. I like the way she gives examples and encourages creativity.
My favorite projects in the book are Jacob’s Ladder Bracelet, the Effortless Elegance Earrings and the Love Hurts Earrings.
The Love Hurts Earrings are my very favorite. Combing copper donuts, texturing techniques, wire and beads with alphabet stamps, it’s a technique I’ll use a lot.

Posted in Beads, wireworking | 1 Comment

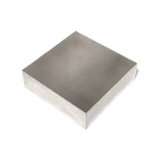
Mini Steel Bench Block by Beadsmith

This is a nice little bench block. Not very expensive, especially with the super saver shipping option.
There is a right side and a wrong side to this bench block. The wrong side of mine had a rough edge, but it was easy to see. The right side is very smoothly polished, there is no wobble to this on my desk, and the small size is a good size for smaller projects like adding texture to copper washers for necklaces or for hardening earring wires. It’s small size makes it easy to keep on my desk and just move it in front of me to use it as needed.
When you get this, it will be coated with a light coat of oil to keep the steel from rusting. A paper towel will remove that. Keep it dry, or if you are going to store it between projects, add a little oil to the surface to retard rust.
If you mostly work on small projects, or have space limitations, I can recommend this bench block with no reservations.

This is actually the bench block I use most.

Posted in Tools, wireworking | Leave a comment

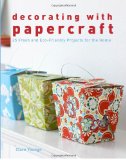
Decorating with Papercraft: 25 Fresh and Eco-Friendly Projects for the Home

The introduction includes a bit on the history of paper and the tools and techniques you’ll need to complete the projects in the book.

Then you get to the projects. The projects use all sorts of paper, from tissue paper to card stock, re-purposed paper like from pages of books, newspaper or maps. They are diverse. Really showing this wonderful medium to it’s best advantage. The projects are well explained with complete supply lists and templates.
Techniques include paper mache, folding, cutting, piercing, piecing, decoupage, sewing, folding curves and others.
Some of the projects are things you’d expect, pinatas, stab bound books, and photo cubes.
But then there is a lot of whimsy that would be wonderful for decorating. A cute airplane covered with old maps that would look great in a child’s bedroom. A mobile of pretty little birds in patterned papers. Delightful decoupaged dimensional letters that would look good on a shelf. Many kinds of flowers made out of different materials, and a wonderful tissue paper wind sock that would blow and move very easily even indoors because it’s so light.
There are also designs that are very stylish. Simply but impeccably made, they would look gorgeous in any home.
Lampshades, mobiles, candle shades, bowls, books, and sculpture, this book has a lot of great ideas.
I liked every project in this book, and found it inspirational for gift giving ideas, projects to do myself, and projects that I could do with my teens. My favorite projects are the Asian Flying Fish wind sock, the Airplane Mobile and the Simple Bowl.

Posted in paper crafts | Leave a comment

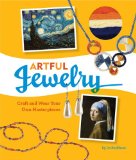
Artful Jewelry

Jo Packham’s book Artful Jewelry: Craft and Wear Your Own Masterpieces takes it’s inspiration from fine art to create simple pieces of jewelry, and comes with supplies to make 6 of the projects illustrated in the book.
This is a great gift option for teens. The projects are simple and have a lot of room for personal interpretation. The instructions are clear and easy to follow and the supplies are easy to find. Now that it’s summer, if you’re looking for fun summer projects, this is the book for it.
Each project starts with a photograph of a masterpiece painting and a bit of history about the art and the artist which makes it’s educational as well. The paintings chosen for the book are some of my favorites.
Da Vinci’s Lady with an Ermine is followed up by how to make paper beads, art from Egypt inspires a safety pin and elastic bracelet that does resemble some of the ornate beadwork from that age. Van Gogh’s legendary Starry Nights is followed up by a gorgeous necklace made with embroidery floss that echoes some of the shapes and colors in the painting and can be made in an evening.
The book covers working with jump rings, knotting friendship bracelets, working with wire and simple head pin earrings, wrapping bases with embroidery floss and making paper beads.
It includes supplies for several of the projects including Vermeer’s “pearl” earring, a bangle bracelet and the above mentioned Starry Nights necklace.
My daughter likes it a lot and can do the projects unsupervised, she’s 14, so I’d recommend it for 10-15 year olds or younger with some light supervision.
If you’d like to get this book, you can get it directly from Chronicle Books or by clicking the Amazon.com link below.

Posted in Beads, Children, kids crafts, seed beads, wireworking | Leave a comment

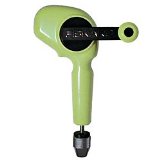
Fiskar’s Craft Drill

After an accident with my flexible shaft drill, I realized I needed something that wouldn’t spin as fast for drilling small plastic items for beads. A friend of mine suggested the Fiskars Craft Drill.
Quick vocabulary list if you haven’t used drills before, the handle is the part you turn. The chuck is the part of the drill you put the bit in, it’s like a collar holding an X shape, you tighten the collar around the X to hold in the bit, or loosen the collar to release the bit. The bit is the part that drills.
The obvious limitations are that’s is a craft drill with a plastic body, it’s not meant to drill metal, or anything really serious, but for paper, plastic and that sort of thing, it’s wonderful. You have control over speed, since it’s manually powered, children can use it with supervision, and it’s quiet. Remember to always using something you don’t mind marking behind whatever you’re drilling. Old phone books work well for me.
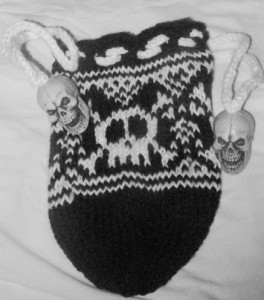
The bits it comes with are a little big for the fine drilling I wanted to do, but after I got it home and out of the package, I couldn’t wait to try it. Changing the bit is easy. Hold the handle still while you twist the chuck open, slip in the bit, then turn the chuck to close. No chuck keys or anything like that, you do have to make sure it’s tightened as far as you can tighten it by hand.I drilled some Halloween skulls into big beads to put on a dice pouch I knitted my son.


The skulls are plastic and hollow, and the sort of thing my flexible shaft could have melted if I wasn’t paying attention.
I needed smaller bits, and I wasn’t sure if it would work with bits that were a lot finer. I got a small pack of 10 sizes including a 1/16th and 5/64th bit. They worked fine once I tightened the chuck up enough.
This works great with soft woods, chip board, and most plastics including resin. It’s quick and easy to use.

You can find the drill on Amazon.com by clicking the image below.

Posted in Tools, Wood | 2 Comments

Walnut Hollow Creative Woodburner Value Pen

I got one of these for my teens to use to make their grandfather a present. It takes a few minutes to warm up completely, and I think we will have to get a second one so they can either each use one or have a couple set up with tips since it needs to cool down before you can change tips. All Walnut Hollow tips like the Woodburning Special Technique Points II set work with these for a lot of versatility.
It’s easy to use, a bit like holding a very thick pencil, and when it’s heated up completely it does a very nice burn on soft woods. I’d recommend parental supervision for children from 7-10 and don’t recommend it at all for younger children unless they are very careful. It does get very hot. It comes with a wire stand to keep it in while you aren’t using it to keep the tip from burning anything.
I got some blank wood plaques for them to practice on before they did the boxes that will be the present. They learned what the tips would do on the back of the plaques and practiced on those, then flipped them over to make signs for their rooms. It’s a hobby they both enjoy very much. My son does geometric designs he lays out on paper then uses graphite paper to transfer the design, my daughter sketches directly on the wood with a pencil then goes over those lines.

Image is an Amazon.com link.


Posted in Children, kids crafts, Wood, wood burning | 1 Comment

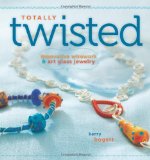
Totally Twisted

The designs in this book are bright, colorful and bold. Made with classic wireworking techniques like coiling and spirals, the jewelry is fresh and fun.
The first part of the book is very well photographed and explained instructions for the basic techniques. How to make earring wires, how to file ends of wire so they aren’t sharp, the tools you’ll need and why. One of my favorite things in these instructions is that the author is a woman after my own heart. She’s not wedded to the idea you need a lot of money to get started. She uses nail files on the wire ends and the same method for doing wrapped loops with one pair of pliers that I usually use. The art glass in the projects are brightly colored lampwork beads, donuts and other shapes. The wire is a mix of sterling wire and colored copper wire, so it’s very affordable.
After that you get into the projects.
There are some projects that require experience working with wire. Fortunately practice pieces made with copper wire aren’t very expensive and make nice gifts as well if you’re happy with how they turn out. A lot of the designs would be very simple for the wire novice to make. Just read through the instructions and practice any part you think you might have a problem with.
The projects are fun. This is one of those few wirework books I’ve read that my 14 year old daughter would truly enjoy. The bright colors and shapes are cheerful and happy. They would make great casual pieces to brighten up an outfit. My favorite projects are the bracelets of course. I love bracelets as a quick accessory to tie together an outfit.
The simple S link Fantasticness made with sterling, a bright colored pillow bead and a very pretty handmade toggle that’s a design element is suitable for business wear.
For a bigger challenge, I love Timeless. Made using coiling, spirals, a handmade toggle and a bright disc bead it’s colorful. It got it’s name for how it looks like a watch but since you can’t tell time on a bead, it’s Timeless.
I like this book for myself. I’m not a wire novice but I’m also not as good with wire as a lot of people are and I know I can learn a lot doing some of these projects. I also like it for my teens who both enjoy working with wire a lot more than seed bead weaving. My son will try the projects using brass, copper and silver for a more industrial look and probably substitute nuts and washers for the beads. My daughter will dig into my collection of lampwork seconds I can’t ever resist at bead shows to find the most colorful of them to make brightly colored pieces.
Image is an Amazon.com link

Posted in Beads, wireworking | Tagged , | 1 Comment